
Adding a Printer to Jamf Pro Web Interface
Background
Jamf gives an accurate description of how to push all the buttons on the web form in the JSS to add a printer in the Jamf Pro Administrators Guide (https://docs.jamf.com/jamf-pro/administrator-guide/index.html). However, the Jamf Pro Administrators Guide falls way short of showing how to actually set up a working printer. It is important to remember that macOS uses the Common Unix Printing System or CUPS for all printing. Also note that most “printers” are really multifunction input and output devices that require additional software to be fully operational.
Creating a useful printer in Jamf Pro usually requires 2 things:
1) upload an install package with the correct software to make all the printer functions work
2) configure the Jamf Pro Printers form with the correct CUPS information including the correctly named Postscript Printer Description(PPD) file and the path it is stored at on the local hard disk.
2.5) In some cases an additional install package containing settings for the custom software and/or configuration for custom accounting software may be needed.
Steps to a Functional Printer Configuration
0) Setup and Test the Printer from a macOS Device
The very first thing to do is to actually setup the printer on macOS and verify that it can print using the Printers and Scanners System Preference. Be sure to name the printer with a name that is appropriate for distribution with JAMF Pro. Once there is a working, tested printer the correct information for the printer configuration in Jamf Pro will be available from that macOS device.
1) Upload printer software package to Jamf Pro if needed.
A great deal of printers will need to have additional software installed to work. Many folks will incorrectly refer to this as “getting the drivers”. At minimum, a PPD file that has all the options for trays, paper types, etc for the printer will need to be installed. Apple does provide a generic PPD that covers both Postscript and PCL devices on each local boot drive at: /System/Library/Frameworks/ApplicationServices.framework/Versions/A/Frameworks/PrintCore.framework/Resources/Generic.ppd
This default PPD automatically selected with the Jamf Pro web form under “Use generic PPD file” may not be adequate for some printers. However using the generic PPD can be useful for testing or if simple text output is all that is needed.
In general, visit the web site of the printer manufacturer and download the latest software for the output device which matches the macOS version being deployed to. Each manufacturer’s web site is different and finding the correct software can sometimes require a call to their support.
Most printer software will come in standard Apple .pkg format and should be properly renamed and uploaded to Jamf Pro for installation with a policy just like any other software. NOTE: Software the is shipped with the printer on media like a CD should be considered obsolete and never used due to the long times printers tend to sit in warehouses before they are sold.
2) Create Printer configuration in Jamf Pro
The task is to provid CUPS with the correct configuration to make the printer available to the macOS device for use. Opening https://nc.jamfcloud.com/printers.html?id=-1&o=c
will begin the printer configuration creation with the New Printer form if the Jamf Pro login has the correct permissions.
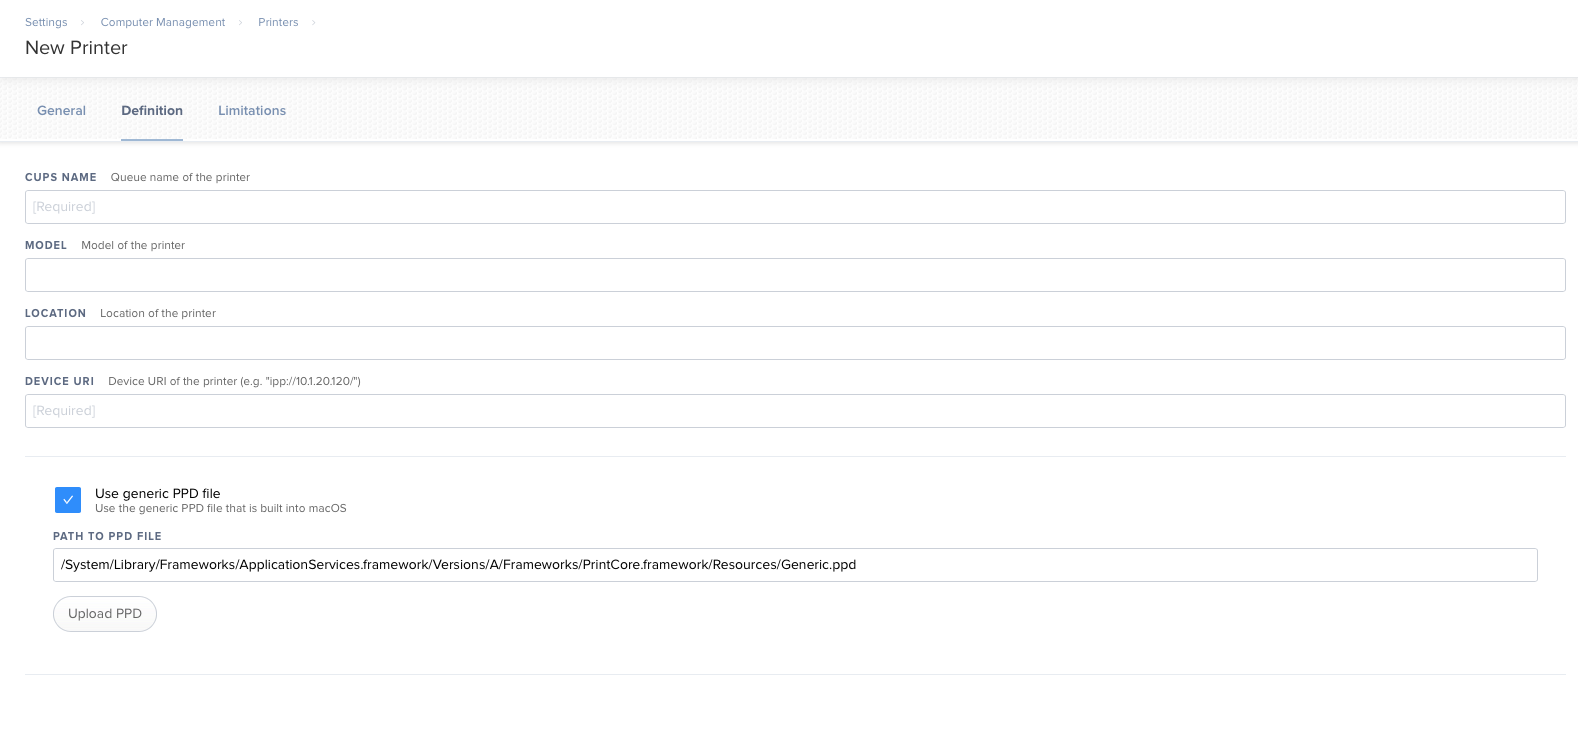
There are three (3) tabs for General, Definition, and Limitations. Fill out the General and Limitations tabs as desired, then click on the Definition tab.
The required fields are:
CUPS NAME Queue name of the printer
MODEL Model of the printer
LOCATION Location of the printer
DEVICE URI Device URI of the printer
A check box to Use generic PPD file
PATH TO PPD FILE Pre-filled with the path to the Apple’s generic ppd file)
Upload Button Upload a printer specific PPD file to Jamf Pro for installation with the printer configuration
All of the definition information for this Jamf Pro form is on the macOS device where the printer was setup for testing in Step 0.
The definition is stored on the local boot disk (usually called Macintosh HD) in the file /etc/cups/printers.conf
For most macOS devices there will be several printers in printers.conf and each definition will be inside the pseudo-xml block that looks like:
<Printer SomePrinterName>
…
</Printer>
For example, we will use a printer named XeroxVersaLinkC7000.
We can read the printers.conf using /Applications/Utilties/Terminal.app by using these unix commands:
sudo more /etc/cups/printers.conf
The Xerox definition in the CUPS printers.conf file looks like:
<Printer XeroxVersaLinkC7000>
UUID urn:uuid:caef3050-9c18-3d2d-6cba-849ba58c4e20
Info XeroxVersaLinkC7000
Location BLD-R22
MakeModel Xerox VersaLink C7000, 4.14.0
DeviceURI ipp://10.0.0.000/ipp/print
State Idle
StateTime 1520636918
ConfigTime 1520636918
Type 8433884
Accepting Yes
Shared Yes
JobSheets none none
QuotaPeriod 0
PageLimit 0
KLimit 0
OpPolicy default
ErrorPolicy stop-printer
</Printer>
Since this printer is already setup it’s name is contained in the opening line of the block:
<Printer XeroxVersaLinkC7000>
as “XeroxVersaLinkC7000”
To make sure we have the PPD file we need use these unix commands in terminal:
ls /etc/cups/ppd/XeroxVersaLinkC7000.ppd
Which should repeat back the correct full path to the PPD file like:
/etc/cups/ppd/XeroxVersaLinkC7000.ppd
Now we can fill out the Jamf Pro New Printer Definition:
CUPS NAME = XeroxVersaLinkC7000
MODEL = Xerox VersaLink C7000, 4.14.0
LOCATION = BLD-R22
DEVICE URI = ipp://10.0.0.000/ipp/print
NOTE: UNCHECK the Use generic PPD file check box
PATH TO PPD FILE = /etc/cups/ppd/XeroxVersaLinkC7000.ppd
Note: Press the Upload PPD button and use the file selection to choose the /etc/cups/ppd/XeroxVersaLinkC7000.ppd
to upload. NOTE: Use Command g in the macOS file selection dialog to get a path dialog for typing in /etc/cups/ppd.
The finished web form should look like this:

Use the Save button in the Jamf Pro web form to save the printer configuration.
NOTE: Be very careful about space and punctuation especially in the MODEL and DEVICE URI fields as everything must be exactly as CUPS has it.
3) Deliver the Printer and software using a Jamf Pro policy
For delivering the printer to macOS devices for use add both the .pkg file and the Printer to a Policy and scope as needed.
The Policy applied with the product of these steps should create a printer on macOS that shows the correct options (trays, options, and features) in the macOS print dialog.