


This page represents Step One (of three)
from Mobile Security for iOS Devices.
Secure your iOS device by performing all of the following procedures:
- Secure Your Device Physically
- Document the Serial Number
- Lock Your Screen
- Enable Failed Passcode Protection
- Set the Lock Screen Timeout
- Update Apps Automatically
- Install System Updates
- Find My Device
NOTE: Only the first few sections include screenshots, which may not match your iOS screen. Because procedures and screens vary depending on the iOS version and system updates, see your iOS device manufacturer’s instructions as needed.
Secure Your Device Physically
To help prevent loss and theft:
- Engrave your name and email on the device. See the WOLF GUARD ID PROGRAM for free engraving services from campus police.
- Insert a business card or any form of contact information into the phone’s case.
- Keep devices hidden in motor vehicles.
- Never leave your device unattended in a non-secure location.
Document the Serial Number
Find the serial number of your device and document it in a safe and secure place.
NOTE: The IMEI (aka, International Mobile Equipment Identity) number is a unique set of 15 digits serving as each mobile device’s serial number.
![]() Tip — If your iOS device has a settings-search capability or Help (?), search for the most unique and relevant keywords as a shortcut for each procedure.
Tip — If your iOS device has a settings-search capability or Help (?), search for the most unique and relevant keywords as a shortcut for each procedure.
To find the serial number of your device
Choose one or more of the following ways to perform this procedure:
![]() See the video.
See the video.
![]() Search the Settings: About
Search the Settings: About
![]() See the following procedure to proceed from Settings through the final screen.
See the following procedure to proceed from Settings through the final screen.
Settings > General > About > IMEI
- Find the Settings icon and tap it.

- General > About
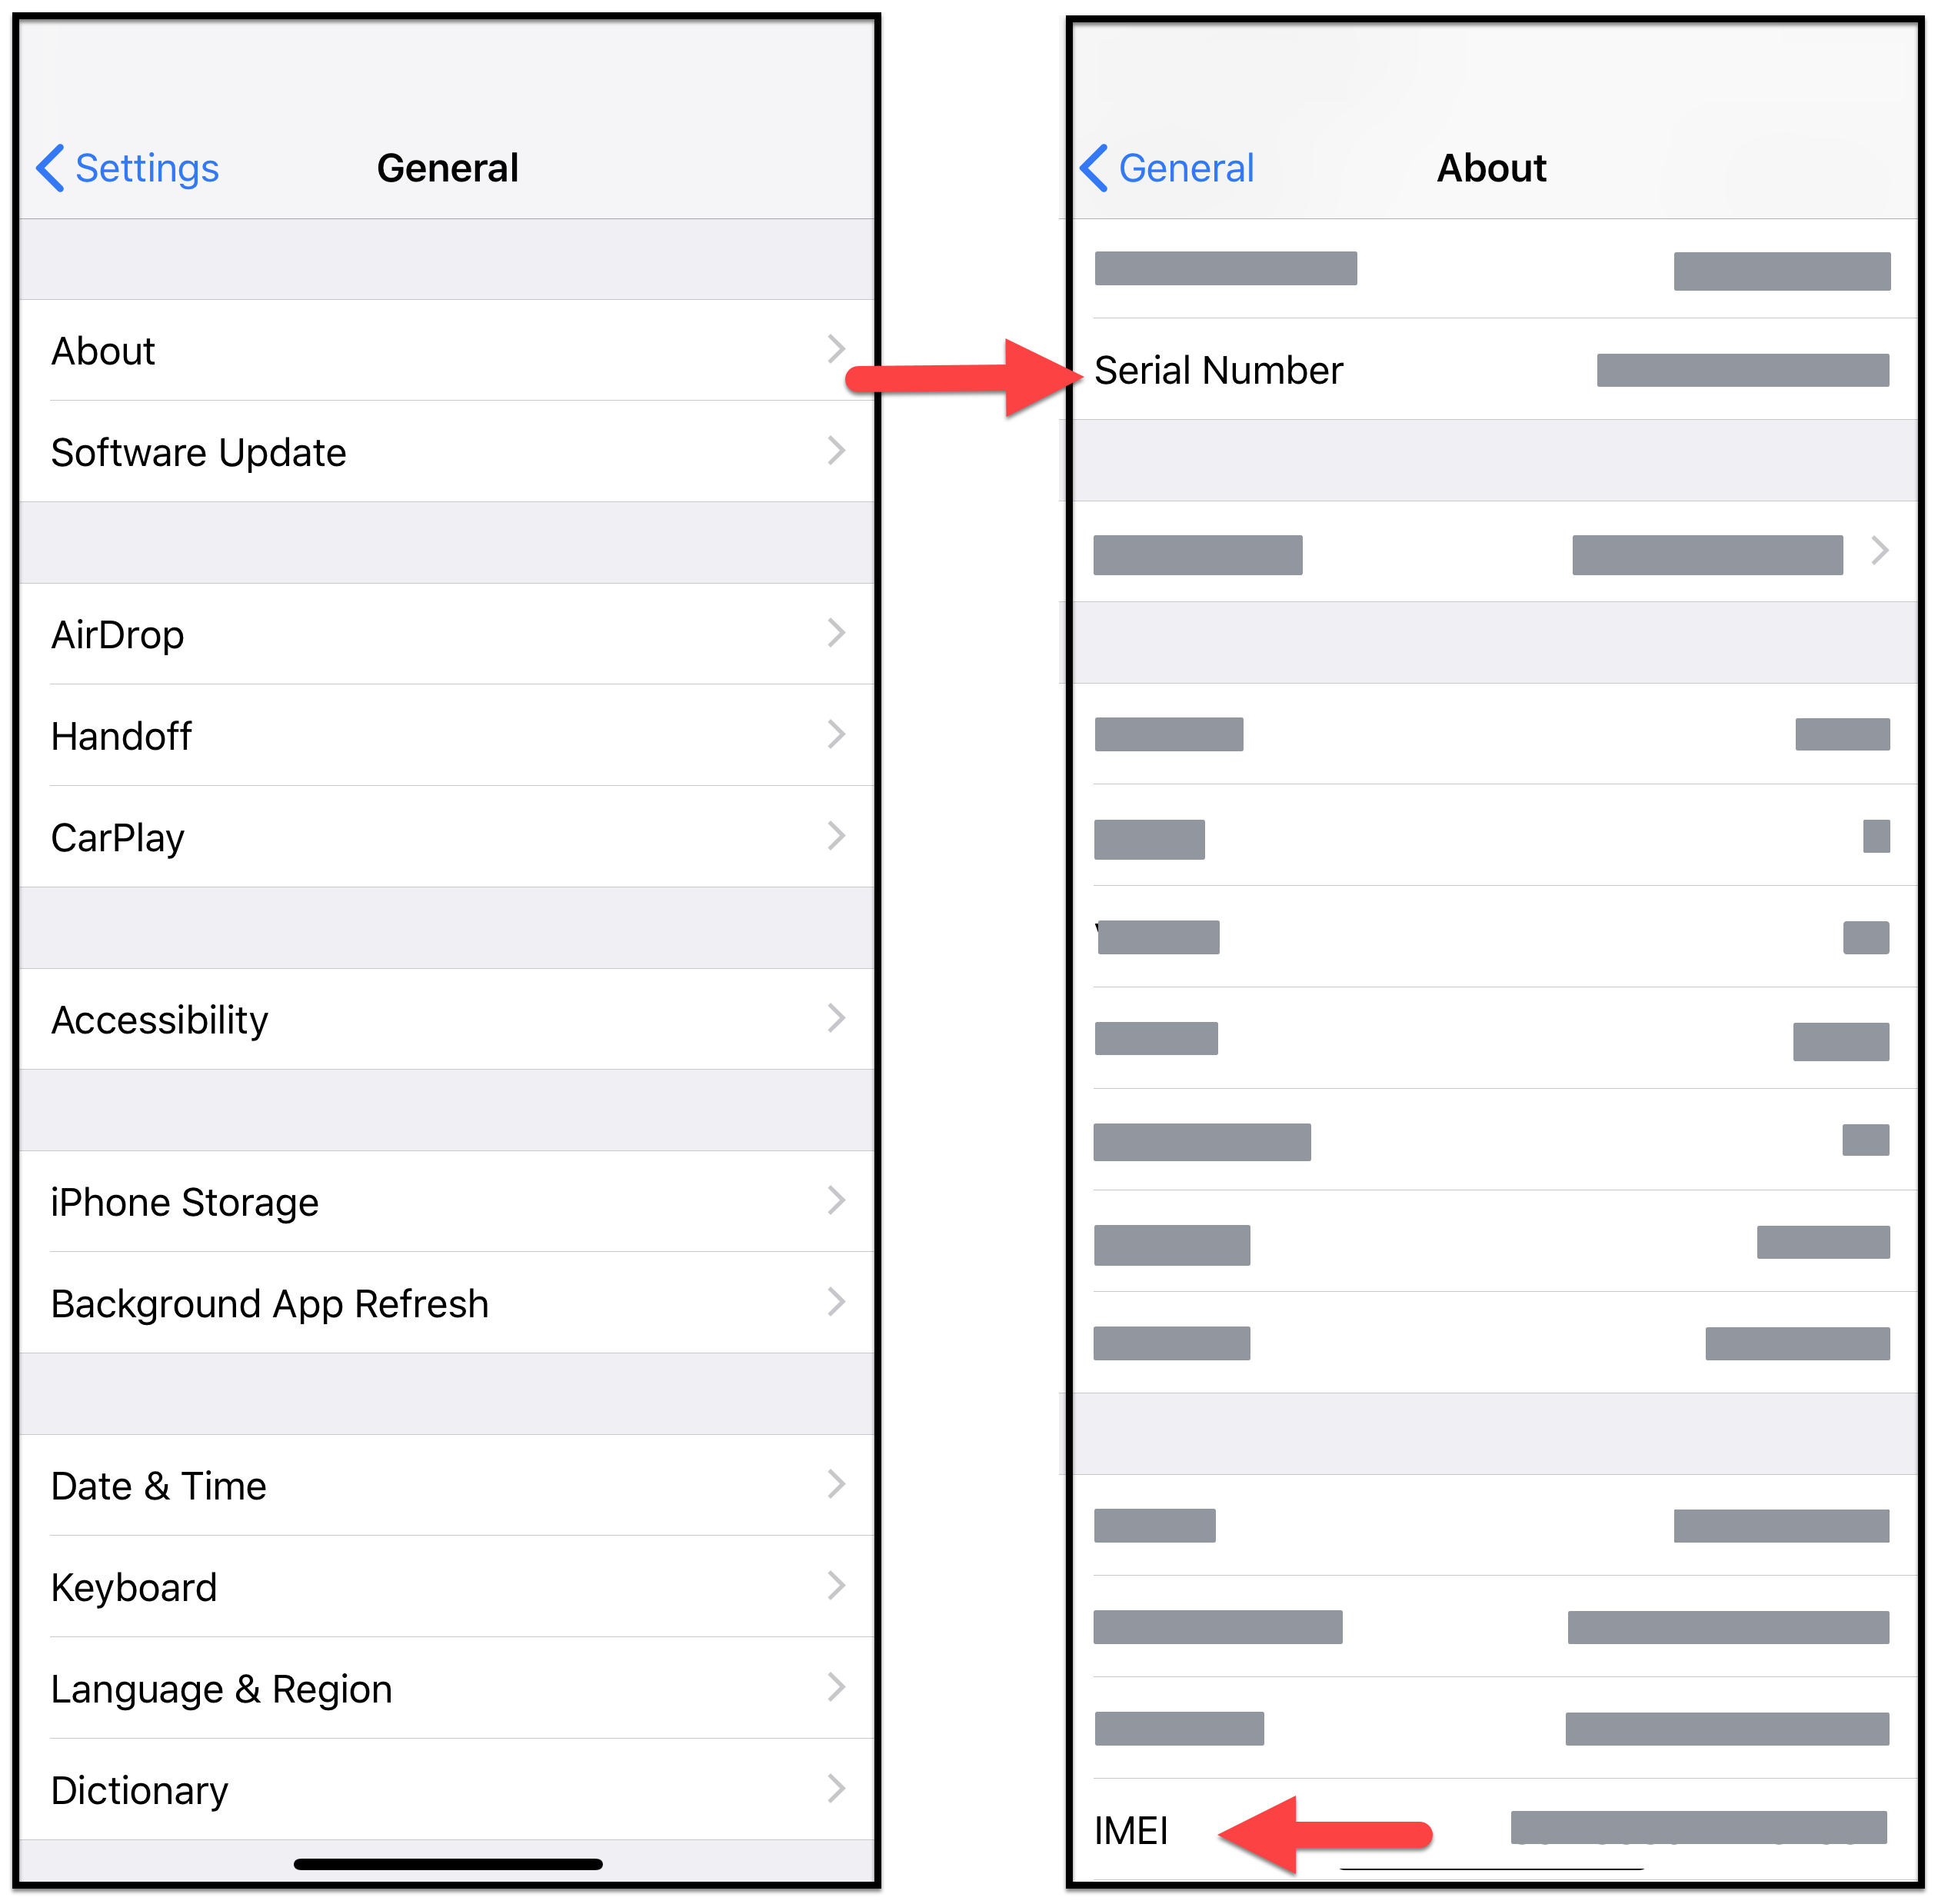
- IMEI information
- Document the Serial Number and the IMEI number in a safe and secure place.
Lock Your Screen
If you leave your device unattended, anyone can access your data unless you lock it.
To lock your screen
Choose one or more of the following ways to perform this procedure:
![]() See the video.
See the video.
![]() Search the Settings: Passcode, Face ID, Touch ID
Search the Settings: Passcode, Face ID, Touch ID
![]() Navigate: See the following procedure to proceed from Settings through the final screen.
Navigate: See the following procedure to proceed from Settings through the final screen.
iPhone X and later: Settings > Face ID & Passcode > Turn Passcode On
- Find the Settings icon and tap it.
- Settings > Face ID & Passcode
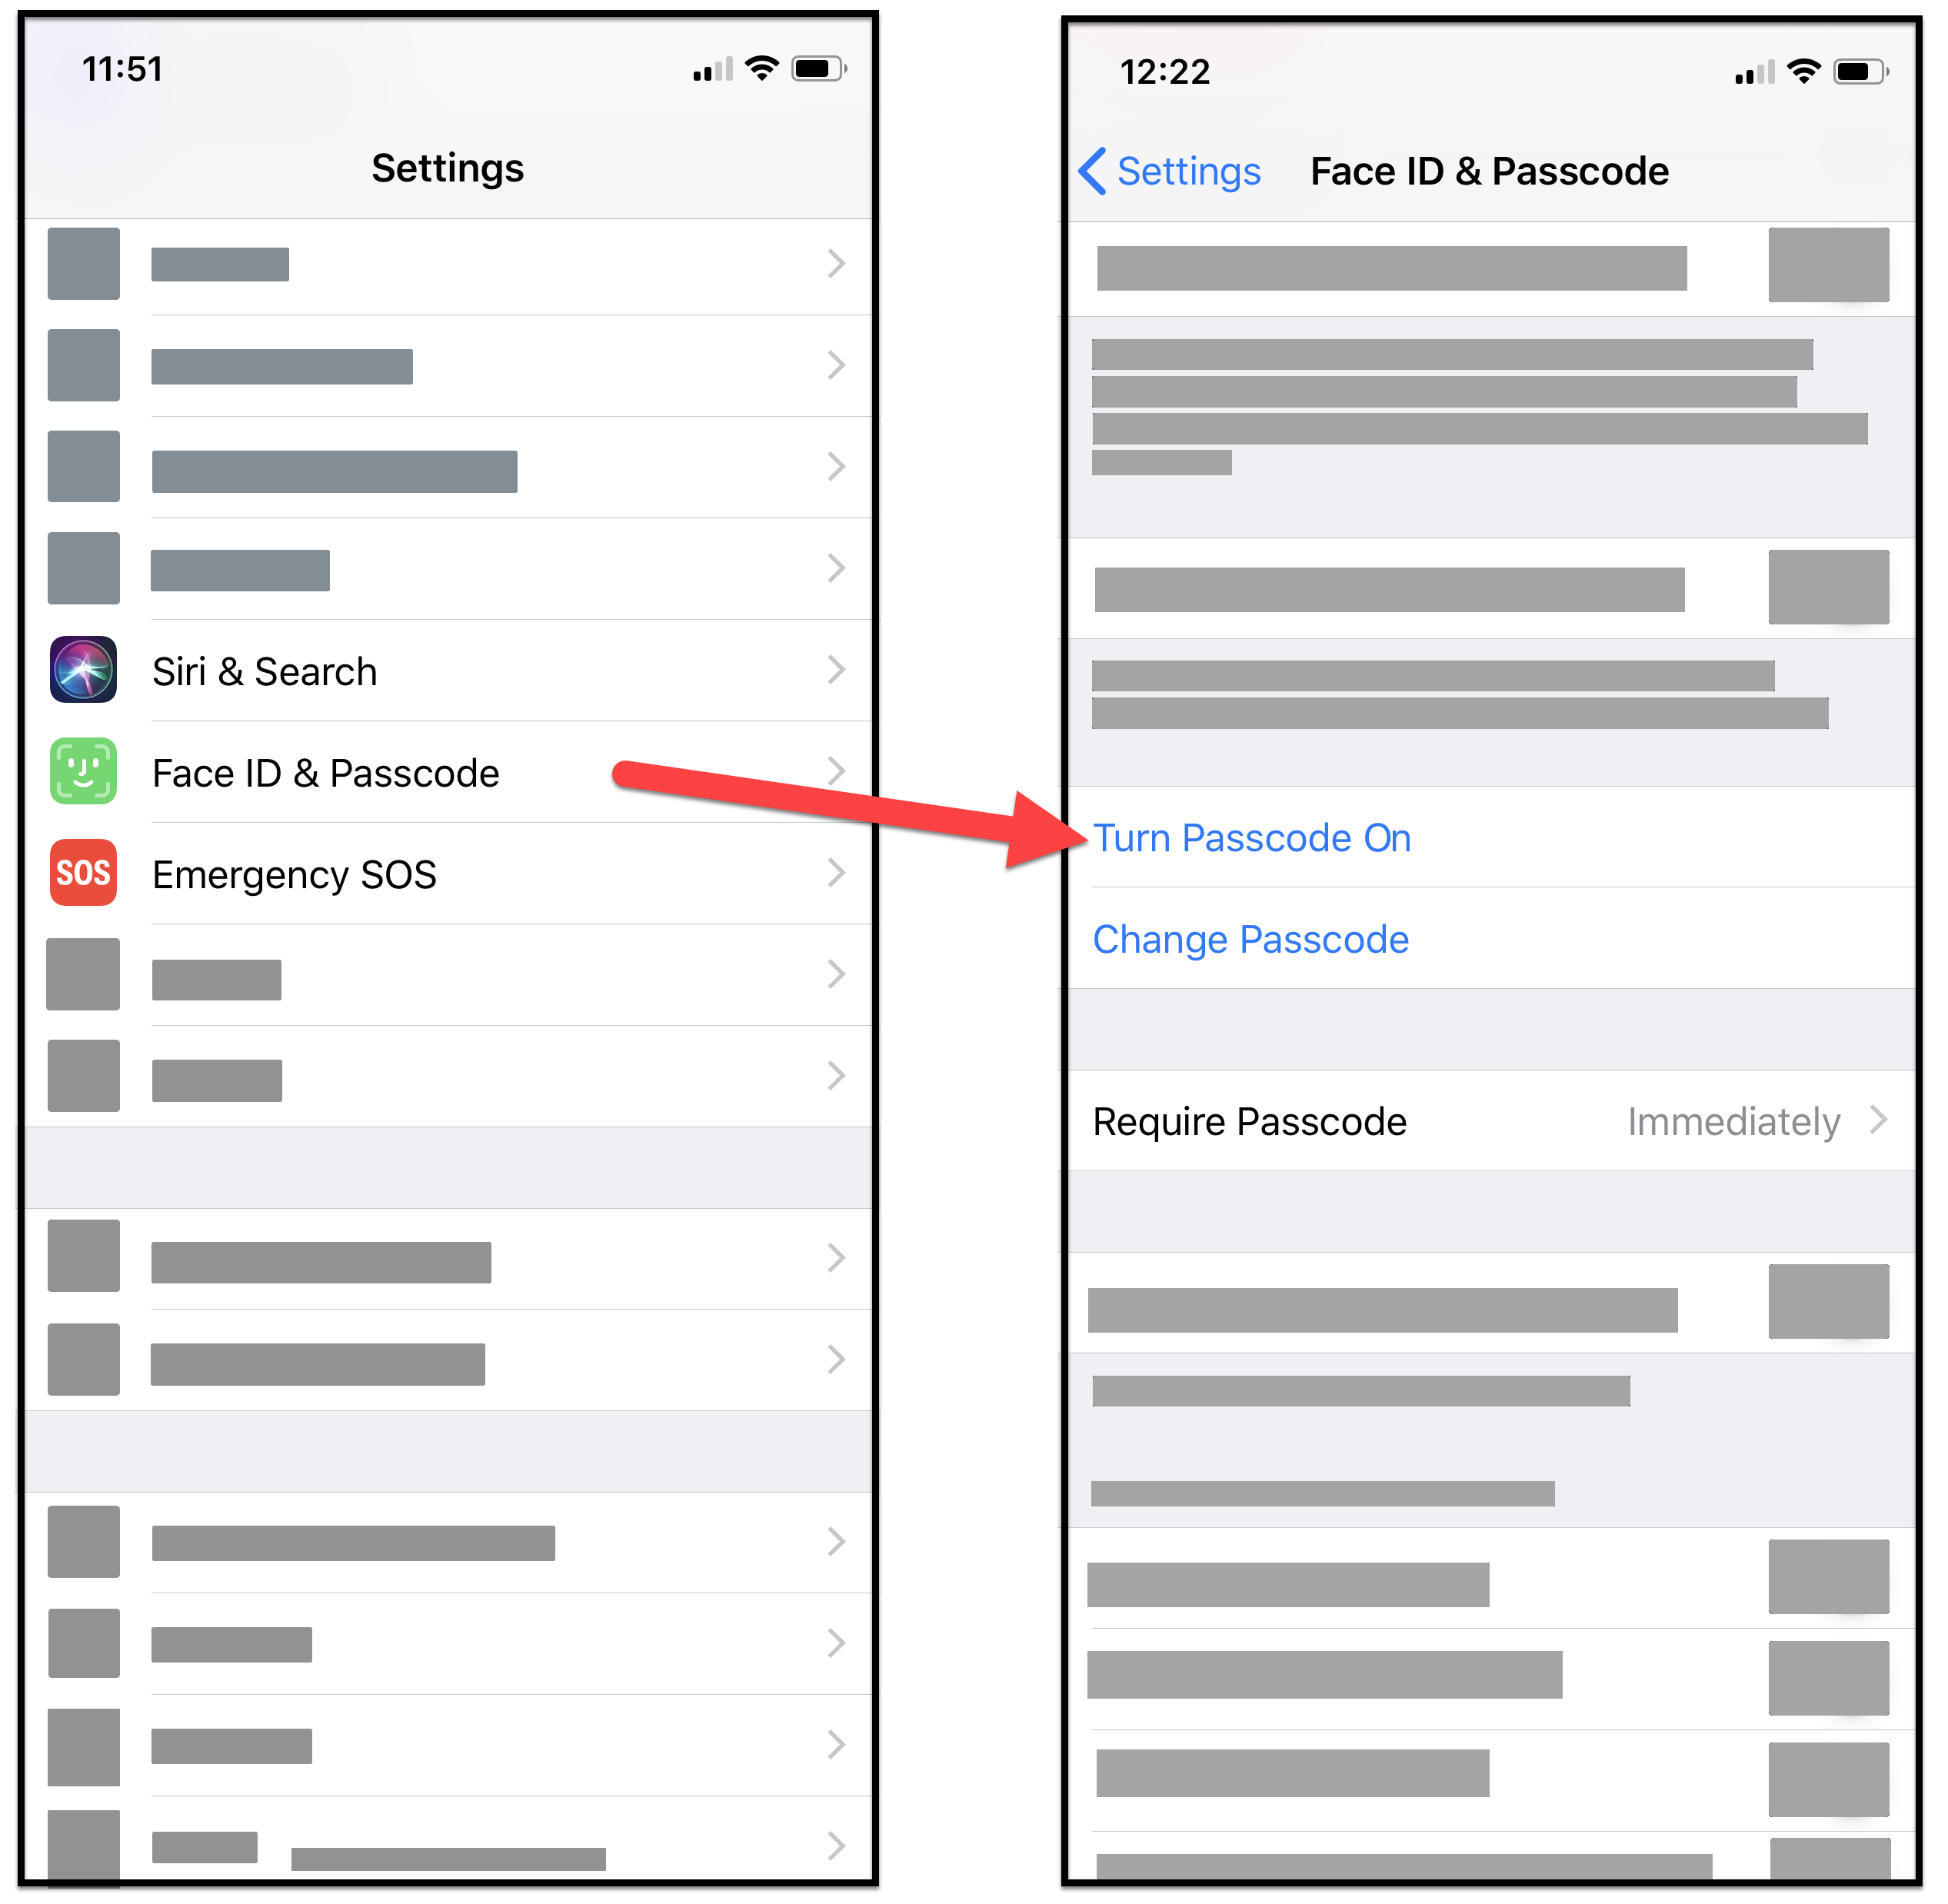
- Turn Passcode On
Other models: Settings > Touch ID & Passcode > Turn Passcode On
- Find the Settings icon and tap it.
- Settings > Touch ID & Passcode
- Turn Passcode On
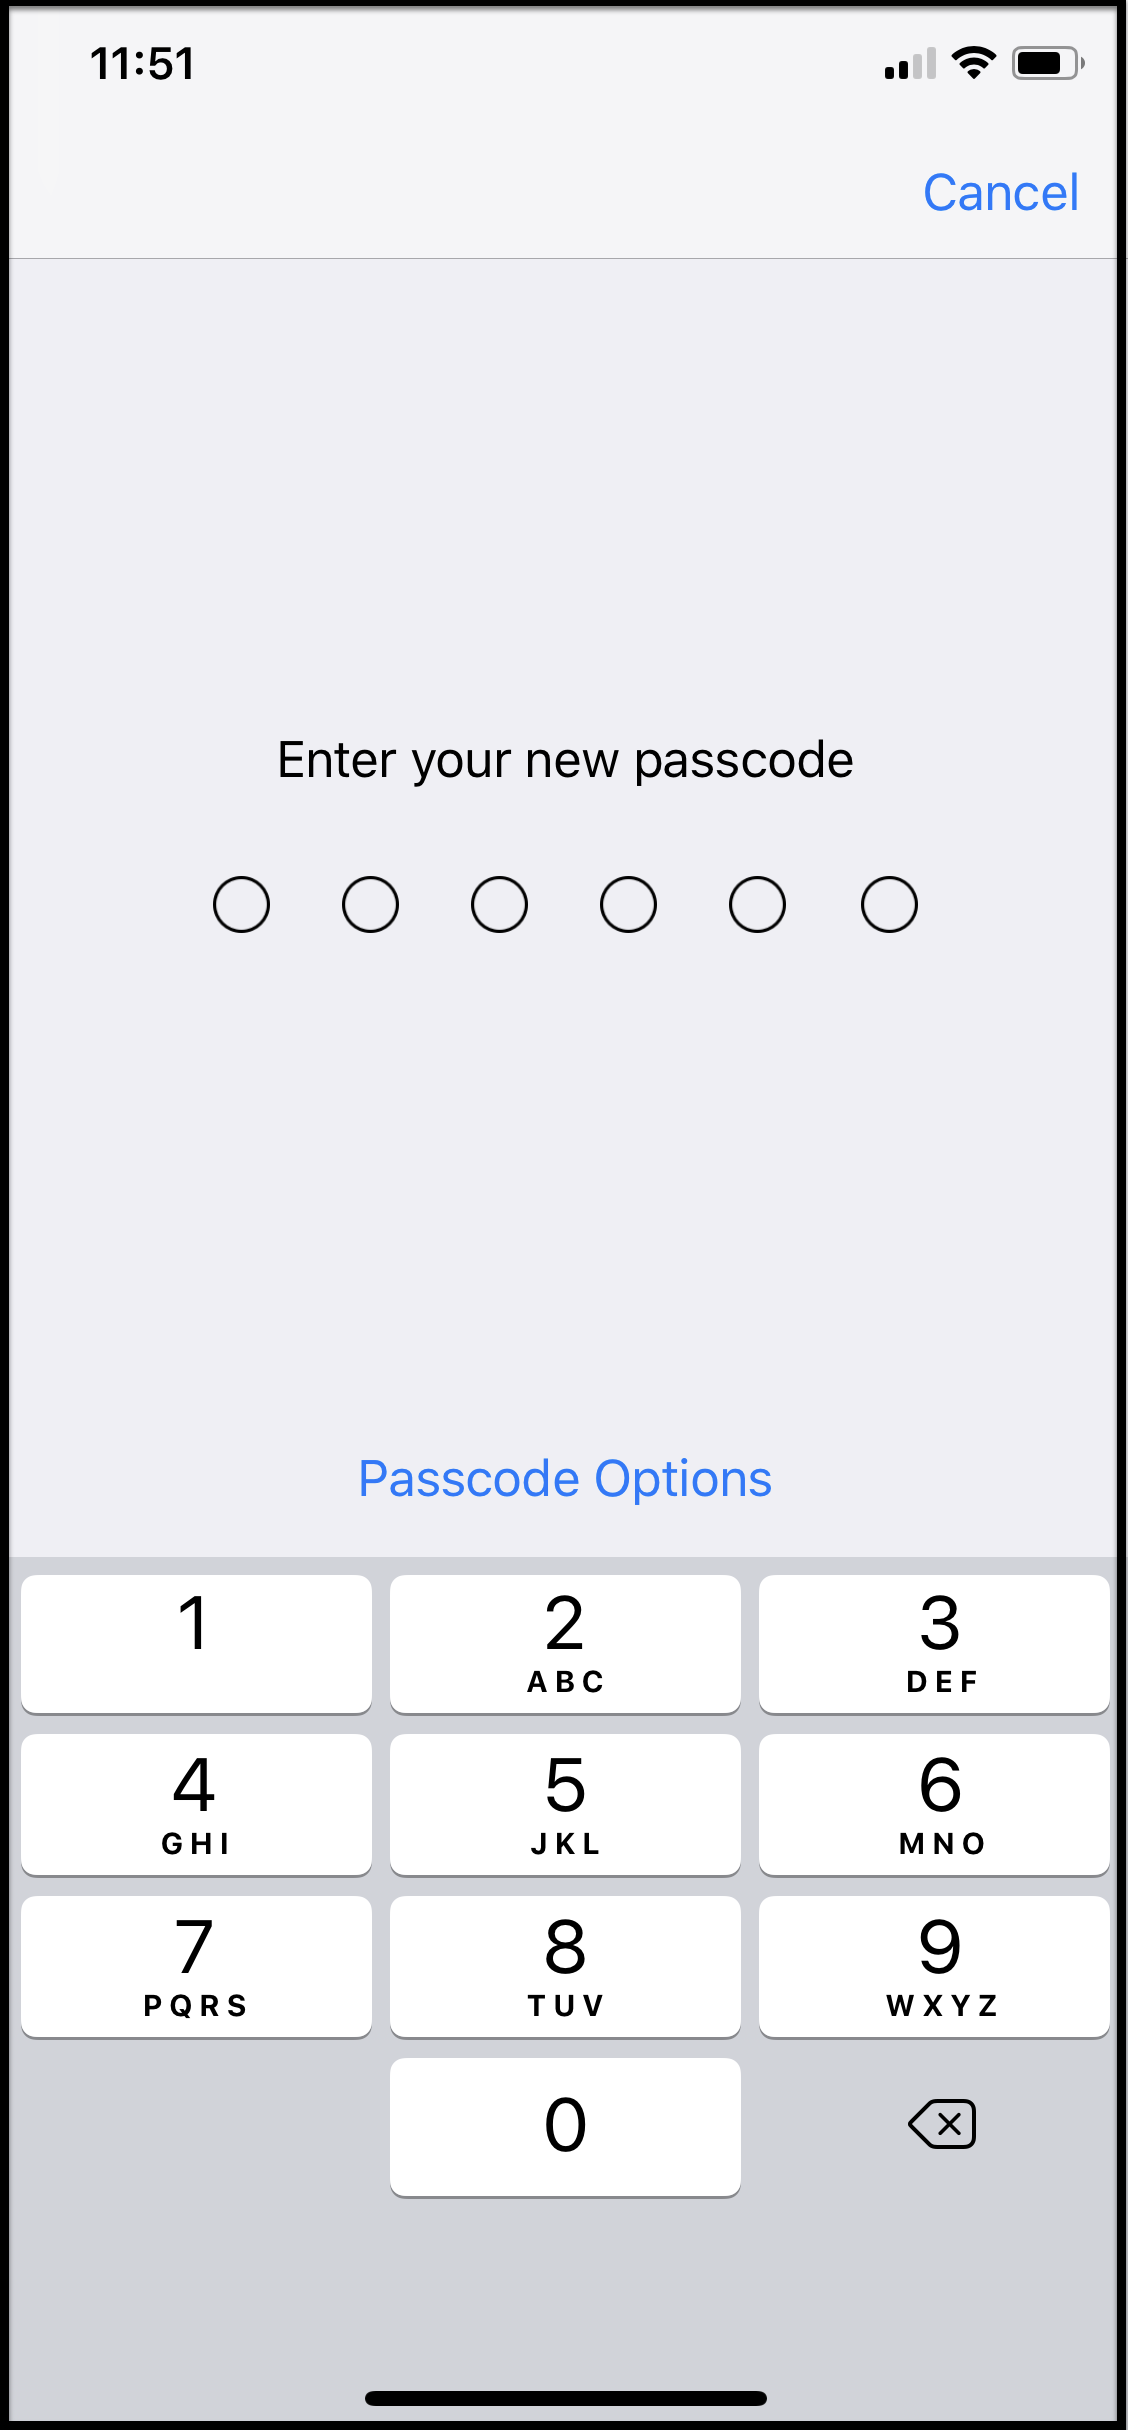
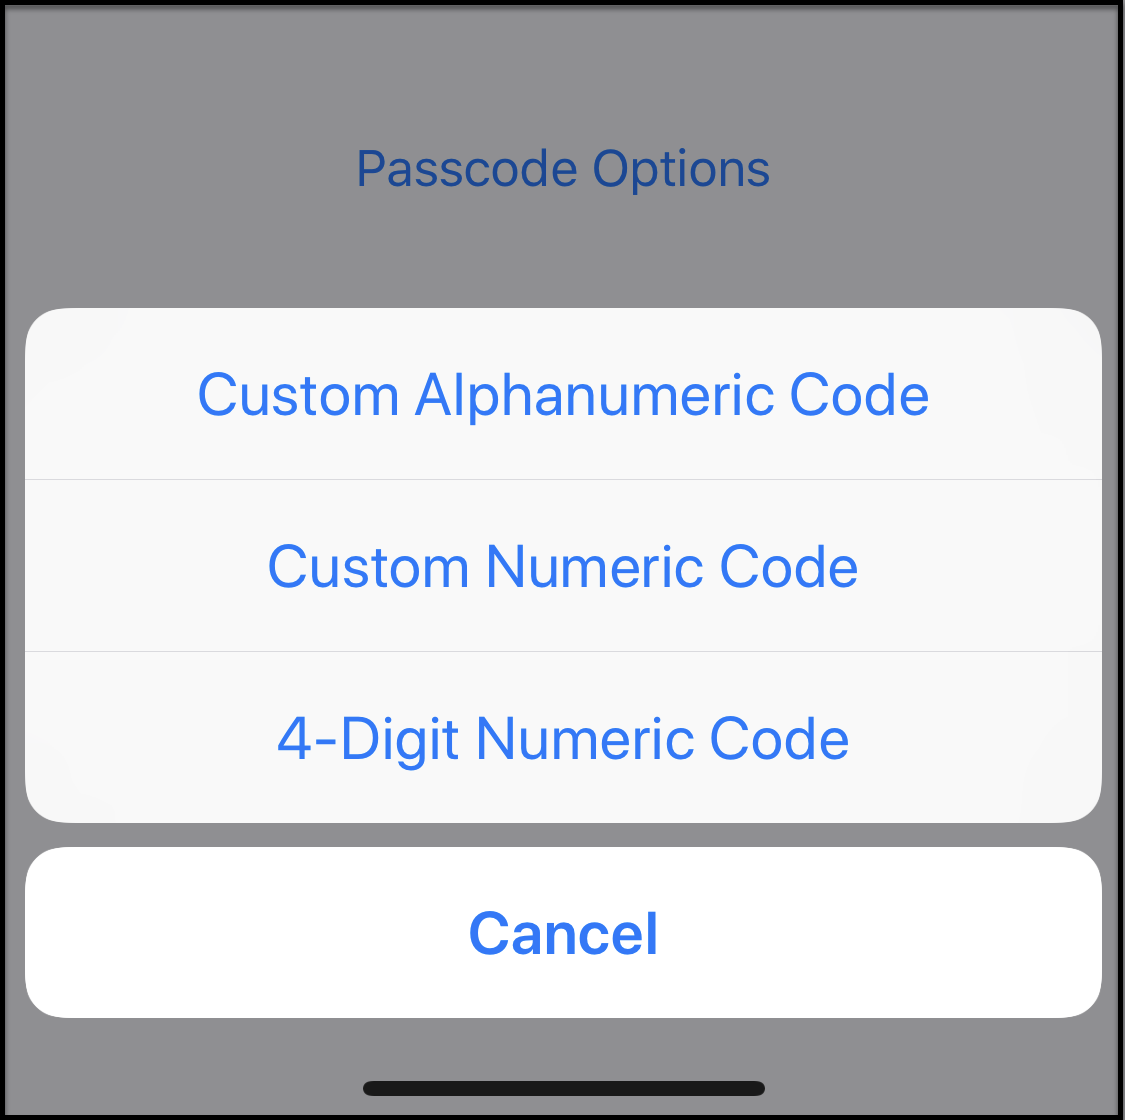
Recommendations for Passcode
- Change this PIN at least once a year.
- Never enable Visible Passwords.
- Do not use Face ID or Touch ID as your only means of security.
- For minimum security, a 4-digit PIN is required by default. Instead, use a longer PIN or an alphanumeric passcode.
Failed Passcode Protection
Now that your phone is locked with a secure passcode known only to you, enable failed passcode protection. This will protect your iOS device if someone attempts to unlock your phone.
 CAUTION: If anyone enters your passcode incorrectly ten consecutive times while this option is enabled, all of the data on your iOS device will be erased immediately. This protects your private information and means you will want to back up your data frequently — possibly as often as every day.
To enable Failed Passcode Protection
Choose one or more of the following ways to perform this procedure:
![]() See the video.
See the video.
![]() Search the Settings: Passcode, Face ID, Touch ID
Search the Settings: Passcode, Face ID, Touch ID
![]() Navigate: Settings > Face ID (Touch ID) & Passcode > Erase Data
Navigate: Settings > Face ID (Touch ID) & Passcode > Erase Data
Set the Screen Lock Timeout
To set timeout periods
- Set the length of time it takes for your screen to turn off when not in use:
![]() See the video.
See the video.
![]() Search the Settings: Display, Auto-Lock
Search the Settings: Display, Auto-Lock
![]() Navigate: Settings > Display & Brightness > Auto-Lock
Navigate: Settings > Display & Brightness > Auto-Lock
- Set the length of time it takes for the passcode to be required after the display turns off:
![]() See the video.
See the video.
![]() Search the Settings: Require Passcode, Face ID, Touch ID
Search the Settings: Require Passcode, Face ID, Touch ID
![]() Navigate: Settings > Face ID (Touch ID) & Passcode > Require Passcode
Navigate: Settings > Face ID (Touch ID) & Passcode > Require Passcode
NOTE: With Face ID or Touch ID enabled, this setting is set to immediately, and is not customizable.
Update Apps Automatically
Apps need to be updated frequently to fix cybersecurity gaps or vulnerabilities.
CAUTIONS:
- Use only vendor-supported versions of any installed applications.
- Remove applications you are no longer using.
Choose one or more of the following ways to perform this procedure:
![]() See the video.
See the video.
![]() Search the Settings: App Store
Search the Settings: App Store
![]() Navigate: Settings > App Store > Automatic Downloads > Toggle on App Updates
Navigate: Settings > App Store > Automatic Downloads > Toggle on App Updates
Install System Updates
System updates include software patches for known cybersecurity gaps and vulnerabilities and should be installed as soon as they are released.
CAUTION: Use only vendor-supported versions of your operating system.
Choose one or more of the following ways to perform this procedure:
![]() See the video.
See the video.
![]() Search the Settings: Software Update
Search the Settings: Software Update
![]() Navigate: Settings > General > Software Update > Automatic Updates > Toggle on both buttons (Download iOS Updates & Install iOS Updates)
Navigate: Settings > General > Software Update > Automatic Updates > Toggle on both buttons (Download iOS Updates & Install iOS Updates)
Find My iPhone/iPad
Find My iPhone / Find My iPad will locate, ring, and remotely erase your device as long as it has data connectivity.
To turn on Find My iPhone / Find My iPad
Choose one or more of the following ways to perform this procedure:
![]() See the video.
See the video.
![]() Search the Settings: Find My iPhone, Find My iPad, iCloud
Search the Settings: Find My iPhone, Find My iPad, iCloud
![]() Navigate: Settings > (Your Name) > iCloud > Find My iPhone
Navigate: Settings > (Your Name) > iCloud > Find My iPhone
NOTE: If you have any questions or concerns about this procedure, ask your IT group for assistance.
Lost or Stolen
If you’re unable to find your device and you are concerned your phone might not be recoverable:

- Report loss or theft of your mobile device (regardless of ownership) to your department and wireless carrier (if applicable).
- Report lost or theft of NC State property immediately to Campus Police and complete/submit the State Property Incident Report.
- Immediately change any passwords saved on the device unless they are secured in a password manager.
Next Step
After completing all procedures from this page, continue with Securing Your iOS Data or return to Mobile Security for iOS Devices.